I had pretty much forgotten about this little device when I recently uncovered it stashed away in one of my drawers. Originally purchased in early 2015 for around $100, it was hooked up to my dumb TV to make it smarter and used as a media center.
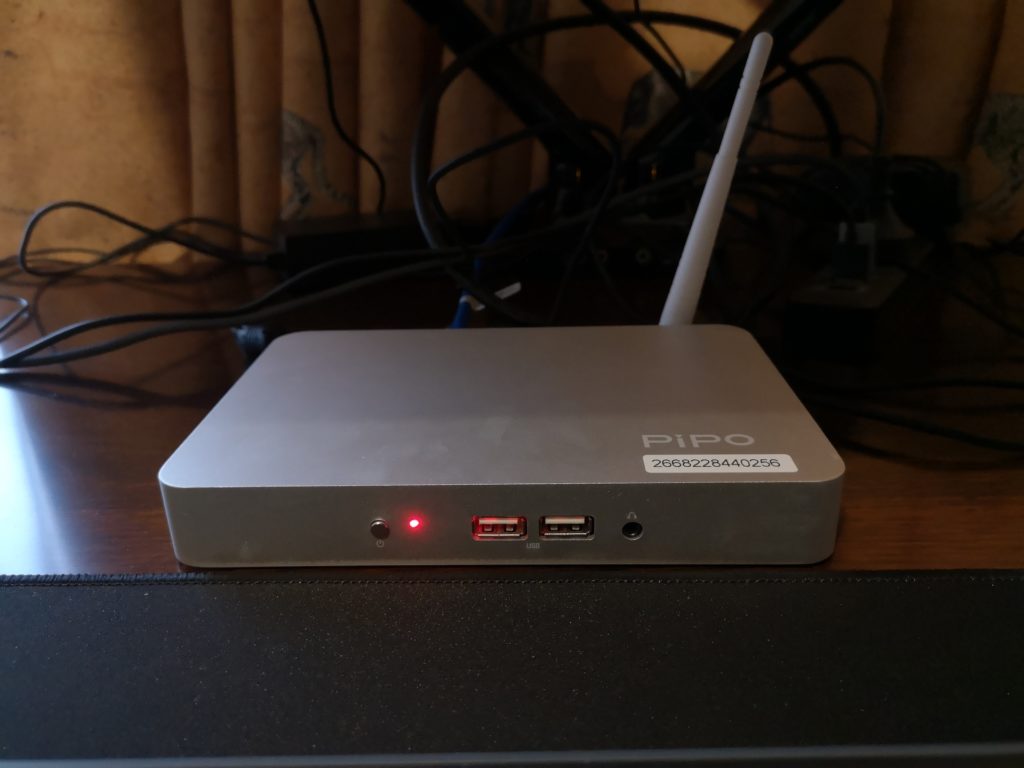
Pipo X7 Specs
- CPU: Quad Core Intel Atom Z3736F 1.33 GHz (2.16 GHz burst)
- Graphics: Intel HD 313 MHz (646 MHz burst)
- RAM: 2G DDR3L 1333Mhz (Single channel)
- Storage: 32G eMMC (Samsung MBG4GC)
- Wireless: 802.11b/g/n, Bluetooth 4.0 (Realtek?)
- IO: 4xUSB 2.0 ports (2 front, 2 back), 1xHDMI out, 1×3.5mm Audio out, 1xTF/micro SD, Fast Ethernet (100/10mbps)
- OS: Windows 10 x64 (upgraded free from Windows 8.1 Bing)
It was able to get a couple of years of use before being replaced by better 4K capable Android media players (NVIDIA Shield).
Having a lot of free time on my hands (thanks COVID) I was curious to see what else it could be used for, so I booted it up and played around a bit.
It has a genuine Windows 10 license (originally 8.1 Bing that was freely upgraded) which I was able to update to the latest patches with no issues.
With the device updated I started playing around with it by attempting to use it as a normal desktop computer. Very quickly I discovered some major downsides to the aging hardware:
- Low RAM: with just 2G of memory this device was seriously struggling when running any modern browser. Even just having a single firefox tab open and browsing YouTube was eating up almost 1G of memory. I also noticed there was a 500M page file being constantly utilised. This resulted in a sluggish and stuttery experience when web surfing.
- Slow Storage: (32G eMMC) though low capacity it is adequate for simple internet browsing and office work. I ran a CrystalDiskMark test and found although the sequential read/write were decent (160M/s & 80M/s) the random R/W were low at 20M/s & 10M/s
- Weak WiFi: the wireless connection was very flaky and signal strength fluctuated dramatically. I was only able to achieve a maximum of 20mbps and averaged around 10mbps.
- Video playback: it was able to handle most 1080p video streams, but anything of significant bitrate or more demanding codecs would suffer pauses and frame drops.
I struggled to use the Pipo as a light office desktop, mainly due to the RAM limitation which modern browsers absolutely eat up.
Enter Lubuntu
To try and get more use out of the Pipo I wanted to install linux and after some quick googling I chose the Lubuntu distro for its supposed light-weight features. So I grabbed the latest LTS version (20.04) from lubuntu.me and created a bootable USB.
By pressing ESC or Del on startup to get into the Pipo BIOS, I configured it to boot from our USB, and here is where a major hurdle occurred:
I couldn’t get the Pipo X7 to load GRUB and boot from the Live USB. It just simply wasn’t displaying anything and would fallback to either the Windows partition or the default EFI.
After searching around, I discovered that this device and many like it are shipped with 32bit EFI firmware which is not included/supported out of the box with most distros. So I continued digging and found an awesome utility by Linuxium called isorespin.sh
Using isorespin I was able to ‘respin’ the Lubuntu ISO to include a 32bit boot loader and support for Intel Atom using the following command:
$ isorespin.sh -i lubuntu-20.04-desktop-amd64.iso --atom
After the utility has finished, a linuxium-*.iso is created and ready to be written to our installation medium (USB). Plugging in the USB and booting from it worked straight away with no issues and I quickly went through the installation steps, opting to format the entire eMMC disk.
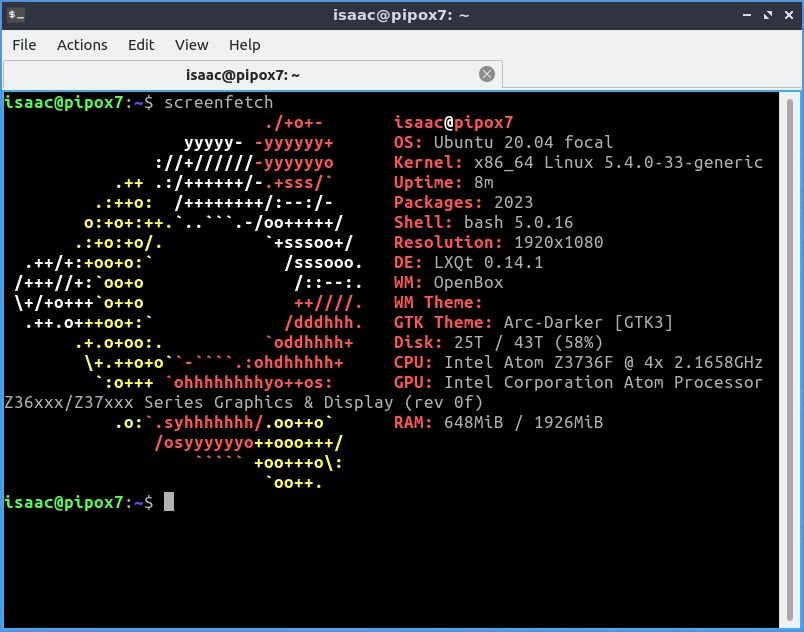
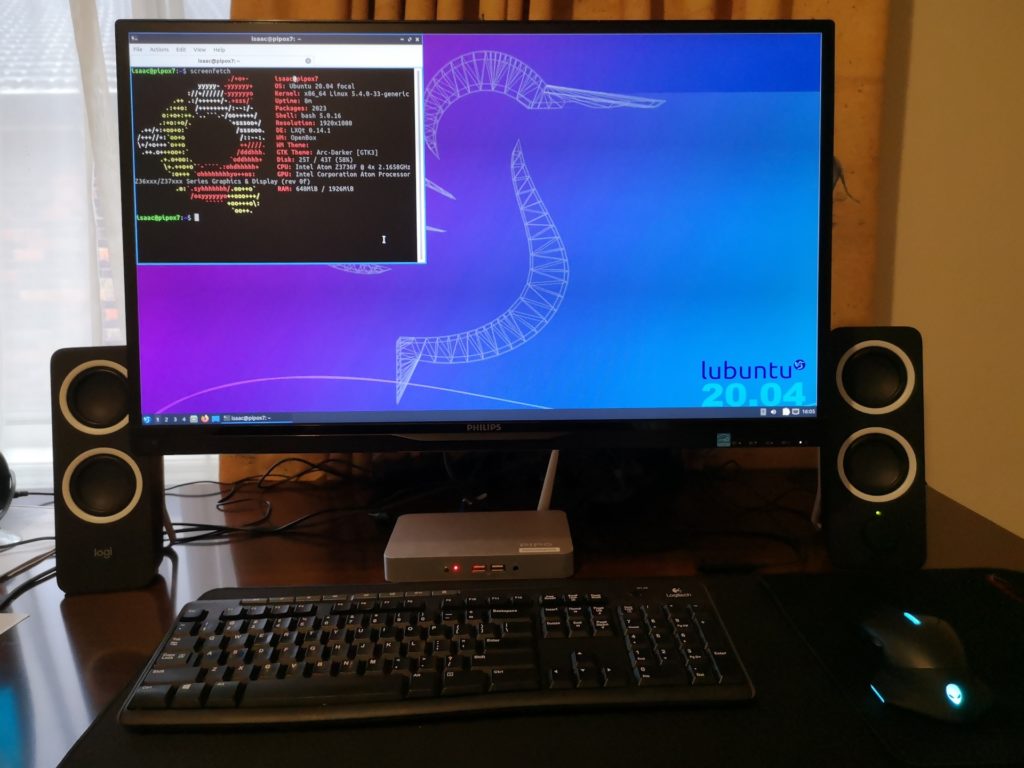
To my joy and surprise, after installing Lubuntu 20.04 LTS everything is working out of the box. The HDMI sound output which had been an issue previously (from ~2015 forum posts) appears to have been fixed in the more recent distros.
The Pipo’s wireless speeds were never very good for me, even though the box itself does feature a wireless antenna it varies greatly between 8-20mbps.
isaac@pipox7:~$ speedtest-cli
Testing download speed................................................................................
Download: 10.24 Mbit/s
Testing upload speed......................................................................................................
Upload: 18.61 Mbit/s
Thankfully the rear fast ethernet jack (100/10) works well and I was able to achieve decent speeds with it plugged in:
isaac@pipox7:~$ speedtest-cli
Testing download speed................................................................................
Download: 85.87 Mbit/s
Testing upload speed......................................................................................................
Upload: 26.91 Mbit/s
Now that the network has been sorted out, I tested the web browser experience and found it to be actually worse than windows 10. The 2G of RAM (around 1.5G available) is taken up by Firefox very quickly with just a couple of tabs open (youtube, reddit etc). Once the memory is filled everything freezes and a force restart is required.
RAM – swap & zramswap
I found that setting up and enabling a swapfile (or partition) helps – I opted for a 2G swapfile, but it is still not ideal.
After looking around I found zramswap which utilises ZRam to create compressed swapfiles in memory. Installing and configuring was simple as follows:
$ isaac@pipox7:~$ sudo apt install zram-tools
I updated the default config to use 70% of RAM as zramswap:
# /etc/default/zramswap
...
# Specifies the amount of RAM that should be used for zram
# based on a percentage the total amount of available memory
PERCENTAGE=70
...
Control and enable/disable zramswap using start/stop/status:
isaac@pipox7:~$ sudo zramswap start
Check to make sure the zramswap service is enabled and running (so it will auto setup on boot):
isaac@pipox7:~$ sudo systemctl status zramswap
Check your swap/zramswap:
isaac@pipox7:~$ cat /proc/swaps
Filename                                Type            Size    Used    Priority
/swapfile                               file            2097148 0       -2
/dev/zram0                              partition       345196  109832  100
/dev/zram1                              partition       345196  111300  100
/dev/zram2                              partition       345196  114776  100
/dev/zram3                              partition       345196  111324  100

isaac@pipox7:~$ sudo swapon --show
NAME       TYPE        SIZE   USED PRIO
/swapfile  file          2G     0B   -2
/dev/zram0 partition 337.1M 107.3M  100
/dev/zram1 partition 337.1M 108.7M  100
/dev/zram2 partition 337.1M 112.1M  100
/dev/zram3 partition 337.1M 108.7M  100
With zramswap configured and enabled, I found the cpu hit was minimal and the web browsing/multitasking experience greatly improved.
Conclusion
An interesting little journey on installing and configuring linux for low powered/resource (ie. RAM) hardware. I hope whoever is reading this gained some insight on installing a 64bit OS onto 32bit EFI. Also setting up swap and zramswap is a crucial step for being able to use modern browsers (Firefox or Chromium) on such low amounts of RAM.
After installing Lubuntu and some tinkering, I am able to do light office work (drafted and published this post with it) and have seen a noticeable improvement in video playback capabilities which I attribute to lower resources of the OS vs Windows 10.
I can also confirm this same process to install linux works for the Ainol Mini PC Z3735F 7000mAh
Resources
- https://forum.freaktab.com/forum/tv-player-support/intel-based-tv-players/pipo-x7-tv-player/22820-pipo-x7-os-linux
- Pastebin describing BIOS settings for similar devices
- http://linuxium.com.au
- https://github.com/kenorb-contrib/isorespin
- https://www.gearbest.com/tv-box/pp_134110.html
- https://www.digitalocean.com/community/tutorials/how-to-add-swap-space-on-ubuntu-20-04
I have 2 of these boxes, with one running a Plex server and a BitTorrent client (under windows). I’m thinking of running Home Assistant on the other and there’s no way I can get it to work under windows. There just isn’t enough resources to run VM for Home Assistant. Do you think it would be ok under Linux/Lubuntu?
I don’t have experience with Home Assistant but I think it should work fine with Lubuntu. On my device Lubuntu is only using around 500mb of RAM so I imagine you should be okay with allocating most to your VM/Docker container. Just be sure to enable swap memory as a fallback.
I went looking for this solution. and it just popped up :_). thanks for this. I grabbed the box out of the storage and I am really looking forward to put a working linux version on this box. Since I am a beginner would it be possible to share your respun ISO somewhere? having all windows machines and macs in the house this respin process is going way over my head. creating a boot usb shouldn’t be an issue and your manual for swap solution I can also follow.
Very much appreciated if you could share it somewhere!
I highly recommend you give the respin utility a try, it’s really not that complicated and will allow you to use the latest image or even other ubuntu flavours/versions (I used a Debian VM on my Windows PC to create it).
But if you really prefer not to then here is the exact respun ISO I used:
https://mega.nz/file/nHx1VaKA#5KjwoBRSgPjPFLZl7O2c42qJay_u57cAiiC5HJOPNis
Let us know how you go 🙂
thanks a lot Isaac. I will keep you posted.
Ok, some progress, but not able to boot yet from USB. I followed your link on pastebin for the proper bios setup. This describes to boot in the OS you need for uefi 32 or 64. 64 for booting in android, windows for 32, and yank out the power cable. What do I need to pick? windows or android?
Second, my usb does not show up in the bios under save and exit settings. not sure how to change boot order then.
image was not properly written to usb. Now it is visible after re-write…..continuing my journey
Good to hear you’re making strides, interesting you have the dual OS version – mine was just Windows. It shouldn’t matter which OS you have if you’re using the respun ISO, but I think the advantage of having/selecting Android is it already comes with 64-bit UEFI which should allow normal ISO installation.
Hi Isaac,
I own a PIPO X7 with a W10 single partition (no double boot)
After creating a respun isobootable USB key (Lubuntu) , and inserting it in an usb slot, I entered the UEFI setup to select the USB boot option:
Available options are:
– UEFI-IN EFI shell
– UEFI OS- Windows boot manager
– UEFI:Generic flashdisk 8.07
…But no”boot from USB” option is available.
Did I miss anything ? Any ideas to force booting on usb ?.
Thanks in advance for your help
Bernard
Hi Bernard, did you try selecting the Generic flashdisk? If that doesn’t work then you may need to try using a different USB key – I have had weird things happen with various USBs over the years.
I was thinking the same thing! Made progress?
Ah interesting 🤔. So what you are saying is that it should work with a standard distribution. Again I am quite a noob. Got it to boot from usb. I will try another iso as well. Not sure if I am able to actually install it. It is full of partitions and I need to read some more stuff on how to actually clean that and set it up properly. Will keep you posted. Thanks.
Yes, if that pastebin guide is to be believed (and you did choose the Android boot method).
So you got the respun ISO to work as a LiveUSB? Were you able to play around and test to make sure it’s working correctly (things like Audio, Display, Network drivers etc)?
I chose to completely nuke my device’s partitions and install on the entire disk as I didn’t plan on going back to windows.
Just an update before going to work :-). I went a different route. I went for Debian raspian desktop :-). Installed it, and currently it is updating. Wifi is working and the rest I need to see. Whiped partitions and the full 32GB is available now. The Os taking up around 6GB. Looking at taskmanager cpu usage is around 6% and mem usage around 250 MB of the available 1.9 GB. Some small error messages at boot-up but it boots into the desktop. Up untill now quite happy and I will report back if there are any hardware issues I run into. Thanks a lot Isaac!!
That’s awesome! I didn’t even know about Debian with Raspberry Pi Desktop – I initially thought you were referring to the ARM Raspbian and was a bit confused.
I’m definitely going to give it a try when I’ve got some spare time – do let us know how you fare as well.
Cheers.
Quite proud of myself :-). Running Home assistant supervised on this Pipo now. Had some issues installing it due to lack of my linux knowledge. I just picked up some manuals on the web, installed docker and portainer and manage to install Home assistant. Want to show you in a picture but there is no option to add it to this message. This is the url i used to install home assistant with some fiddling around. https://medium.com/@jordanrounds/intel-nuc-home-assistant-supervised-7cc52d81744a
Cheers!
Thanks again 😉. https://community.home-assistant.io/t/fanless-pipo-x7s-2015-atom-box-and-supervised-ha/223059
Well done Ronin, glad to hear you got it all set up – your Raspberry Pi Desktop picture looks really good. I think RPD is probably an even more efficient OS choice for this low spec device.
I’ll be referring to your post if I ever get into Home Assistant 😉
Thanks for posting this. Like Ronin mentioned above, I too am looking to run Home Assistant, MQTT broker, and a few other lite weight pieces of software on my old Pipo7. I remember there was a site somewhere on the web that had a few ISO already made, including ubuntu Server. I think I will try your ISO of Lubuntu first and see how it handles the work load.
I’m wondering how you were able to get the system to consistently boot in to Lubuntu. I can’t seem to find the right steps (bit of an amateur). I’ve tried installing GRUB but every time I power down after installing Lubuntu, I can’t boot back in to it and have to boot from USB again.
I can see I have the filesystem created in /dev/mmcblk1 partitions so not sure what step I’m missing!
Apologies I missed this comment, were you able to solve the issue?
Hello,
I have installed Linux Mint on pipo x7s few years back. I used the same script – isorespin.sh
It is now time to install new version of Mint but I can’t seem to get it to boot. I am wondering how did you write the respun image on USD? Did you use ‘dd” (if yes which exact command) or you used Rufus or something else? If Rufus, did you write it in GPT or MBR partition scheme?
Hi Andrius, I did use Rufus and I believe it was MBR for the partition scheme. Make sure you have set it to boot from USB in the Pipo’s BIOS.
Thank you, Isaac, I will try Rufus then. I am wondering if you noticed any kernel freezes on your setup? Not sure if that cstate linux kernel bug was fixed.
I did experience some freezes but they were related to RAM/swap space being exhausted. So I’m not sure about that bug you mentioned, though reading the recent replies in your linked thread does raise concerns as you pointed out.
This is from isorespin.sh documentation:
https://linuxiumcomau.blogspot.com/2017/06/customizing-ubuntu-isos-documentation.html?showComment=1609940372681#c6704828078733083840
Kernel freezes
Well known and well documented without a permanent fix or so it seems. Kernels after v3.16 seem to include something that caused them to randomly freeze on Intel Atom devices and then the whole system hangs. Subsequently an accepted workaround was recommended to limit the processor (CPU) to a certain power state or ‘C-state’ and if freezes are encountered then to pass ‘intel_idle.max_cstate=1’ as a boot parameter. Later kernels have included patches and the current state seems to be reliable enough to ignore the workaround. If however freezes still occur the easiest way to implement the workaround on an installed system is to edit the file ‘/boot/grub/grub.cfg’ and modify to look like:
GRUB_CMDLINE_LINUX_DEFAULT=”intel_idle.max_cstate=1″
Alternatively the following command can be entered:
sudo sed -i ‘s/\(GRUB_CMDLINE_LINUX=\)””/\1″intel_idle.max_cstate=1″/’ /etc/default/grub
followed by:
sudo update-grub
and then a reboot as the change only needs to be made once typically following installation.
Wanted to answer my own question. I needed to spam F7 on startup to prompt the boot menu and be able to boot from the USB (called ‘UEFI USB device’ or something of the sort) otherwise I got white screen and nothing would boot after that. I used Rufus to make the USB, I selected ‘persistence’ option and set it to 256Mb and then chose GPT partitioning scheme instead of MBR. After that unplug all external USB/HDD/microSD, boot from the USB (press F7 on startup to do that), select ‘try lububtu’ to boot Live USB, then connect the live system to internet and then launch the installer from there. I think if you are not connected to the Internet during the installation the 32-bit GRUB will not install meaning your new system will not boot and you will need to install the GRUB manually after that, which is not all that beginner friendly.
Also, seems like they did fix the kernel freeze issue in kernel version 5.11.16. I have been running it for few days now and did not experience any freezes. For the record, I did not use the ‘zram’ trick described in the original post.
sorry I meant USB not USD. That was a typo.
Also, few years back I had to limit processor’s cstate to 1 because of the kernel freezes caused by this bug:
https://bugzilla.kernel.org/show_bug.cgi?id=109051
The bug report says it is fixed now however looks like some people are still experiencing this issue if you scroll to the bottom of that super long thread.
I am wondering if you had any kernel freeze issues in your setup
I have a Pipo X7s that I had upgraded to Win 10 but now all the recent updates fail to install for who-knows-what-reason.
So Linux here I come.
I’ve been creating Linux servers on old laptops for home use for a couple of years now. So familiar with the outcome.
Your posting is a gem, Isaac. Very simple, straightforward and so reassuring.
I can boot Lubuntu off the USB, but only if I do a boot override and select it from the BIOS menu. It boots to GRUB then to Lubuntu. I’ve changed the Boot Priority so that the USB stick is 1st preference but the system just ignores it and boots Windows. I get the same outcome if I set the first boot device to the UEFI OS or UEFI Built in EFI Shell.
Has anyone had this sort of problem?
If I install Lubuntu would it be possible that the EFI bootloader might just continue to point to Windows Boot Manager that isn’t there?
So, I went and did it anyway using the existing partitions. As suspected, the box became unbootable trying to find a Windows partition that no longer existed.
I reinstalled but this time erased the disk and let the Ubuntu installer do it’s stuff. Success.
Lubuntu was installed as the first boot preference and I still can’t change the order (can’t boot from USB without boot override from the BIOS) but it all works.
It’s now a nice little low power consumption Linux box.
Paul, I don’t remember exactly what I did but I think that the Pipo’s original OS bootloader (Windows and Android) will override any BIOS or GRUB settings if you checked that box “remember selection” or “don’t ask again” or whatever it is called so the boot selection does not appear next time. I am pretty sure I restored Windows then launched that WinToAnd.exe script (if you don’t have it, google it) and then made sure that the Windows/Android OS selection appears on every boot. After that you can wipe everything and install Linux. I think I removed and re-created ESP partition as well because the original one was too small (70 Mb if I remember correctly).
good morning
I have a pipox7 that runs with windows 10 but the audio does not work and it is very slow
I would like to put it under linux but not being an expert I got a bit lost and I did not understand at the end which is the best version to use and how to proceed to install it.
Thank you if any of you can give me some indication to make a simple installation.
Ps I have always kept it very clean but I would like to know if after many years you think it is better to open it and clean it. Is there any thermal paste like I’ve heard for other computers to change?
Ps I’ve always been very satisfied
I had a hard time installing linux mint on it through linuxium.
After image respun, the kernel files are put in a folder called casper
To solve it, I have to access grub first, then use the command line.
grub> linux /casper/vmlinuz root=/dev/sda1
grub> initrd /casper/initrd.lz
For full instructions (which I edited some) can be found here:
https://askubuntu.com/questions/1117391/live-usb-error-you-need-to-load-the-kernel-first
I am a linux newbie. That’s the best I could do at the moment
Hi,
I started my homelab adventure with a PiPO X7. This guide helped me install Ubuntu Server (Linuxium provides the image) into this box and I hosted my Discord bot on it.
Now I have a Synology NAS, a custom built router running pfSense and an old laptop running Proxmox. I just want to say thank you for this guide!
Now this box is running LibreELEC with a FILRC IR remote receiver. It started as a TV box and ended as a TV box (but much more lightweight) 😀
For those who are interested, you can find support for 32bit EFI for LibreELEC here:
https://forum.libreelec.tv/thread/6602-32bit-efi-uefi-support-for-le/
I could not get any Ubuntu version to update any Ubuntu ISO using –atom. It always errored about the .deb package being invalid. But I was able to use the pre-spun ISO on the first try, so that’s a possible option for anyone else seeing the same.
Hi Issacs, the Pipo x7 still has life. thanks to this post. I was looking for a low powered simple home assistant system and blew the dust off this pipo i had laying around for a bout a decade. and using the modified image with a 32bit UEFI boot (https://url.linuxium.com.au/latest-atom-ubuntu-22_04_iso) i was able to load ubuntu live onto the pipo x7 and then restore the home assistant image (as detailed in their documentation being the easiest way to load home assistant. once that was done it booted straight into home assistant. and its a still pretty capable system (For home assistant at least). it’s even running a sky connect dongle with Zigbee2MQTT installed.