Dumping/Exporting peewee results to CSV file

Had a need to quickly export some large datasets from a MySQL database to CSV file. Decided on using python and the peewee package.

I found the process to be very quick and straightforward to set up my data models and do some simple querying. The tricky part was on how to export the peewee query result set to a CSV file.

Reading the docs mentioned a method for retrieving data as ‘tuples‘ which can then be written to file with the standard python csv package:

myData = Model.select().where(Model.deleted_at == None).tuples()

My other requirement was to define the CSV data headers which we are able to retrieve in proper order from the model’s _meta attribute like so:

headers = [h for h in Plant._meta.sorted_field_names]

With the model’s attribute headers defined we can write a simple python function to export a peewee tuple result including the data headers:

import csv
import time
from peewee import *

# removed peewee model and db definition for brevity

def writeToCsv(data, filename):
    print("Writing to csv: {} ...".format(filename))
    with open(filename, 'w', newline='') as out:
        csvOut = csv.writer(out)
        # column headers
        headers = [x for x in Model._meta.sorted_field_names]
        csvOut.writerow(headers)

        # write data rows
        for row in data:
            csvOut.writerow(row)

# Retrieve data set as tuples
myData = Model.select().where(Model.deleted_at == None).tuples()

# export to csv file
writeToCsv(myData , "myData_{}.csv".format(time.time_ns()))

References:
https://docs.peewee-orm.com/en/latest/peewee/querying.html?highlight=csv#selecting-multiple-records
https://stackoverflow.com/questions/13864940/python-dumping-database-data-with-peewee
Installing latest NodeJS on Ubuntu 16.04

Getting the latest NodeJS (14.x) is fairly straightforward for Ubuntu/Debian 16.04

$ sudo apt-get install software-properties-common
$ curl -sL https://deb.nodesource.com/setup_14.x | sudo -E bash -

References:

https://nodejs.org/en/download/package-manager/#debian-and-ubuntu-based-linux-distributions

https://github.com/nodesource/distributions/blob/master/README.md

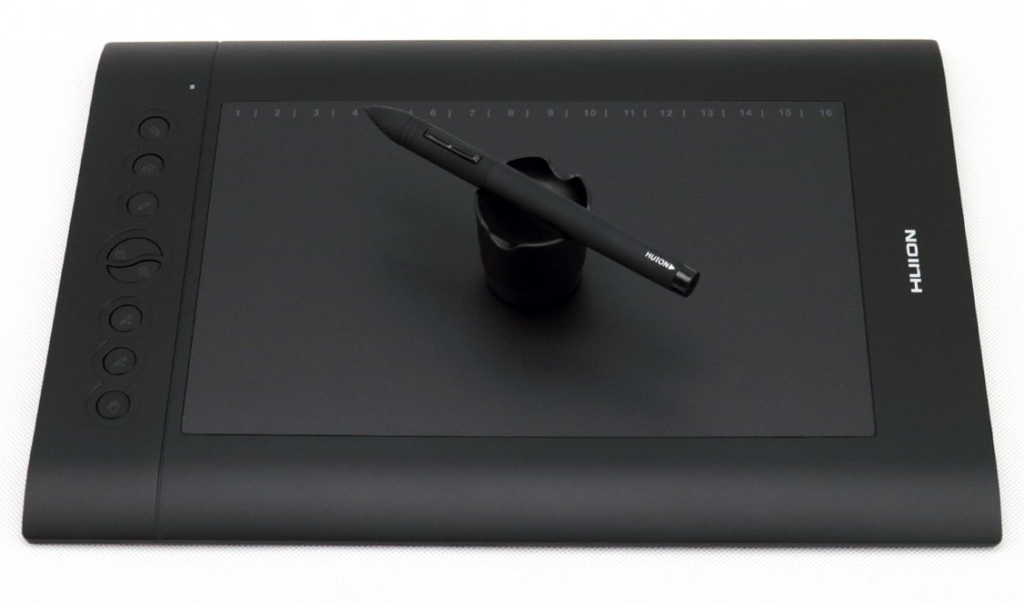
Mapping HUION H610 Drawing Tablet Buttons

A quick one. I had previously only used my HUION H610 tablet with Windows so I was surprised to find how easy it was to set up and go in Linux.

Plugging it in via USB and the stylus worked out of the box for my Lubuntu 20.04 LTS (kernel 5.4.0) but none of the tablet buttons were working.

Here are the steps I took to fix this:

First check if it’s recognised as a tablet driver:

isaac@pipox7:~$ xsetwacom --list

If there is no output then it needs to be loaded.

List USB devices to get the tablet’s USB ID – mine had a blank name/description (256c:006e)

isaac@pipox7:~$ lsusb
Bus 002 Device 001: ID 1d6b:0003 Linux Foundation 3.0 root hub
Bus 001 Device 006: ID 256c:006e
Bus 001 Device 005: ID 0461:4ec0 Primax Electronics, Ltd
Bus 001 Device 004: ID 046d:c534 Logitech, Inc. Unifying Receiver
Bus 001 Device 003: ID 05e3:0608 Genesys Logic, Inc. Hub
Bus 001 Device 002: ID 0a46:1269 Davicom Semiconductor, Inc. DM9621 USB To Fast Ether
Bus 001 Device 001: ID 1d6b:0002 Linux Foundation 2.0 root hub

Now to configure the tablet input with wacom drivers I did the following:

isaac@pipox7:~$ sudo nano /etc/X11/xorg.conf.d/52-tablet.conf

# Inside I pasted the following:
Section "InputClass"                                                                                                                                                                                                                         
  Identifier "Huion on wacom"                                                                                                                                                                                                                
  MatchUSBID "256c:006e"                                                                                                                                                                                                                     
  MatchDevicePath "/dev/input/event*"                                                                                                                                                                                                        
  Driver "wacom"                                                                                                                                                                                                                             
EndSection

Reboot and check that it is now recognised in xsetwacom:

isaac@pipox7:~$ xsetwacom --list                                                                                                                                                                                                              
HUION PenTablet Pen stylus              id: 12  type: STYLUS                                                                                                                                                                                 
HUION PenTablet Pad pad                 id: 13  type: PAD 

Finally it’s time to map the buttons. For convenience I followed recommendations to create a bash script that would run on session start to persist the mappings:

#!/bin/sh                                                                                                                                                                                                                                    
xsetwacom --set 'HUION PenTablet Pad pad' Button 1 "key +ctrl +z -z -ctrl"                                                                                                                                                                   
xsetwacom --set 'HUION PenTablet Pad pad' Button 2 "key e"                                                                                                                                                                                   
xsetwacom --set 'HUION PenTablet Pad pad' Button 3 "key b"                                                                                                                                                                                   
xsetwacom --set 'HUION PenTablet Pad pad' Button 8 "key +"                                                                                                                                                                                   
xsetwacom --set 'HUION PenTablet Pad pad' Button 9 "key -"                                                                                                                                                                                   
xsetwacom --set 'HUION PenTablet Pad pad' Button 10 "key ]"                                                                                                                                                                                  
xsetwacom --set 'HUION PenTablet Pad pad' Button 11 "key ["                                                                                                                                                                                  
xsetwacom --set 'HUION PenTablet Pad pad' Button 12 "key p" 

And it is as simple as that. The tablet and stylus are fully functional and can be further customised to suit individuals needs.

References

Migrating Django production database from SQLite3 to PostgreSQL using PgLoader

Today I ran into the issue of having to migrate an sqlite3 database to postgres for a Django app that was in production. The data needed to be kept untouched and seamlessy transitioned as it was real production data. After some research on the subject there were at least two options I found that worked.
Firstly always make sure you have safely backed up your sqlite database, next correctly setup your new database in postgres. (

$ createdb <db_name>

)

The first method is to use django to dump the database as json objects using:

$ ./manage.py dumpdata > db-data.json

Apply your database config changes to your app’s settings.py file and then import the database from the json file with:

$ ./manage.py loaddata db-data.json

But this operation was taking a long time and used a high amount of memory to export and import all my production data.

Enter PgLoader.

To import from your sqlite database simply run the following command (no sqlite data exporting required!):

$ pgloader --type sqlite db.sqlite3 postgresql://:@localhost/

I had initially run into some errors trying to use PgLoader such as:
An unhandled error condition has been signaled:

Failed to connect to pgsql at :UNIX (port 5432) as user “”: Database error 28000: role “” does not exist

I just entered the database credentials (db_username and db_password) to the command above.

An unhandled error condition has been signalled: :UTF-8 stream decoding error on #: the octet sequence #(204 199) cannot be decoded.

This was resolved after providing the –type flag to specifically tell PgLoader that the database was of sqlite type.

                    table name       read   imported     errors            time
------------------------------  ---------  ---------  ---------  --------------
fetch                                   0          0          0          0.000s
fetch meta data                        37         37          0          0.047s
create, truncate                        0          0          0          1.406s
------------------------------  ---------  ---------  ---------  --------------
django_migrations                      14         14          0          0.103s
app_userclass                           0          0          0          0.009s
app_userseries                      40132      40132          0          3.200s
app_usercollection                  50248      50248          0         27.978s
app_user                             2893       2893          0          1.251s
app_user_roles                          0          0          0          0.008s
app_externallink                        0          0          0          0.009s
app_tag                                 0          0          0          0.013s
app_file                                0          0          0          0.009s
app_screenshot                     392909     392909          0       1m51.695s
app_thanks                              0          0          0          0.015s
app_collectiontag                       0          0          0          0.028s
app_articles                        71307      71307          0         52.428s
auth_group                              0          0          0          0.015s
auth_group_permissions                  0          0          0          0.010s
auth_user_groups                        0          0          0          0.016s
auth_user_user_permissions              0          0          0          0.009s
django_admin_log                        0          0          0          0.037s
django_content_type                    17         17          0          0.094s
auth_permission                        51         51          0          0.061s
auth_user                               0          0          0          0.008s
django_session                          0          0          0          0.061s
index build completion                  0          0          0          0.064s
------------------------------  ---------  ---------  ---------  --------------
Create Indexes                         29         29          0          6.186s
Reset Sequences                         0          0          0          1.435s
------------------------------  ---------  ---------  ---------  --------------
Total streaming time               557571     557571          0       3m20.009s

As seen from the results table, all data and indexes were successfully transferred into the PostgreSQL database. I quickly ran some tests to confirm everything was running fine.

All in all a relatively quick and painless transition from sqlite to postgres thanks to PgLoader.

Some resources:

Downloading shared Dropbox files to a remote server via command line (CLI) and cURL

On occasions I have found it very handy or even necessary to download large archive files from a Dropbox share to a remote server. Rather than downloading it to my local machine and then uploading it back to the server (via FTP for example). It can be directly downloaded to the target machine through the terminal.

Simply make sure the share url has dl=1 appended as a query parameter:

curl -L -o archive-name.zip https://www.dropbox.com/sh/r4nd0mURL?dl=1

-L is telling cURL to retry the request to the specified redirect location, if a location header is received from a 3XX response. For example if Dropbox gives a HTTP 3XX redirect response directing to a temporary download link, cURL will re-try the request using the link. Basically it will follow the redirect if there is one.

-o is simply for the output filename of where you want to store the response.

Resources: