Arch (Manjaro) Linux Remap Left and Right Audio Channels to be Reversed

Note: this was performed back in 2019.

# Create additional pulse audio config directory if not already exists
$ sudo mkdir /etc/pulse/default.pa.d

# Create additional config
$ sudo nano /etc/pulse/default.pa.d/reversed.pa

load-module module-remap-sink sink_name=reverse-stereo master=0 channels=2 master_channel_map=front-right,front-left channel_map=front-left,front-right

# Uncomment below if wanting to set as default
# set-default-sink reverse-stereo

# Restart pulse audio NOTE: run without sudo
$ systemctl --user restart pulseaudio

Now you should be able to view the new audio device in Sound settings.

Dumping/Exporting peewee results to CSV file

Had a need to quickly export some large datasets from a MySQL database to CSV file. Decided on using python and the peewee package.

I found the process to be very quick and straightforward to set up my data models and do some simple querying. The tricky part was on how to export the peewee query result set to a CSV file.

Reading the docs mentioned a method for retrieving data as ‘tuples‘ which can then be written to file with the standard python csv package:

myData = Model.select().where(Model.deleted_at == None).tuples()

My other requirement was to define the CSV data headers which we are able to retrieve in proper order from the model’s _meta attribute like so:

headers = [h for h in Plant._meta.sorted_field_names]

With the model’s attribute headers defined we can write a simple python function to export a peewee tuple result including the data headers:

import csv
import time
from peewee import *

# removed peewee model and db definition for brevity

def writeToCsv(data, filename):
    print("Writing to csv: {} ...".format(filename))
    with open(filename, 'w', newline='') as out:
        csvOut = csv.writer(out)
        # column headers
        headers = [x for x in Model._meta.sorted_field_names]
        csvOut.writerow(headers)

        # write data rows
        for row in data:
            csvOut.writerow(row)

# Retrieve data set as tuples
myData = Model.select().where(Model.deleted_at == None).tuples()

# export to csv file
writeToCsv(myData , "myData_{}.csv".format(time.time_ns()))

References:
https://docs.peewee-orm.com/en/latest/peewee/querying.html?highlight=csv#selecting-multiple-records
https://stackoverflow.com/questions/13864940/python-dumping-database-data-with-peewee

Installing latest NodeJS on Ubuntu 16.04

Getting the latest NodeJS (14.x) is fairly straightforward for Ubuntu/Debian 16.04

$ sudo apt-get install software-properties-common
$ curl -sL https://deb.nodesource.com/setup_14.x | sudo -E bash -

References:

https://nodejs.org/en/download/package-manager/#debian-and-ubuntu-based-linux-distributions

https://github.com/nodesource/distributions/blob/master/README.md

Mapping HUION H610 Drawing Tablet Buttons

A quick one. I had previously only used my HUION H610 tablet with Windows so I was surprised to find how easy it was to set up and go in Linux.

Plugging it in via USB and the stylus worked out of the box for my Lubuntu 20.04 LTS (kernel 5.4.0) but none of the tablet buttons were working.

Here are the steps I took to fix this:

First check if it’s recognised as a tablet driver:

isaac@pipox7:~$ xsetwacom --list

If there is no output then it needs to be loaded.

List USB devices to get the tablet’s USB ID – mine had a blank name/description (256c:006e)

isaac@pipox7:~$ lsusb
Bus 002 Device 001: ID 1d6b:0003 Linux Foundation 3.0 root hub
Bus 001 Device 006: ID 256c:006e
Bus 001 Device 005: ID 0461:4ec0 Primax Electronics, Ltd
Bus 001 Device 004: ID 046d:c534 Logitech, Inc. Unifying Receiver
Bus 001 Device 003: ID 05e3:0608 Genesys Logic, Inc. Hub
Bus 001 Device 002: ID 0a46:1269 Davicom Semiconductor, Inc. DM9621 USB To Fast Ether
Bus 001 Device 001: ID 1d6b:0002 Linux Foundation 2.0 root hub

Now to configure the tablet input with wacom drivers I did the following:

isaac@pipox7:~$ sudo nano /etc/X11/xorg.conf.d/52-tablet.conf

# Inside I pasted the following:
Section "InputClass"                                                                                                                                                                                                                         
  Identifier "Huion on wacom"                                                                                                                                                                                                                
  MatchUSBID "256c:006e"                                                                                                                                                                                                                     
  MatchDevicePath "/dev/input/event*"                                                                                                                                                                                                        
  Driver "wacom"                                                                                                                                                                                                                             
EndSection

Reboot and check that it is now recognised in xsetwacom:

isaac@pipox7:~$ xsetwacom --list                                                                                                                                                                                                              
HUION PenTablet Pen stylus              id: 12  type: STYLUS                                                                                                                                                                                 
HUION PenTablet Pad pad                 id: 13  type: PAD 

Finally it’s time to map the buttons. For convenience I followed recommendations to create a bash script that would run on session start to persist the mappings:

#!/bin/sh                                                                                                                                                                                                                                    
xsetwacom --set 'HUION PenTablet Pad pad' Button 1 "key +ctrl +z -z -ctrl"                                                                                                                                                                   
xsetwacom --set 'HUION PenTablet Pad pad' Button 2 "key e"                                                                                                                                                                                   
xsetwacom --set 'HUION PenTablet Pad pad' Button 3 "key b"                                                                                                                                                                                   
xsetwacom --set 'HUION PenTablet Pad pad' Button 8 "key +"                                                                                                                                                                                   
xsetwacom --set 'HUION PenTablet Pad pad' Button 9 "key -"                                                                                                                                                                                   
xsetwacom --set 'HUION PenTablet Pad pad' Button 10 "key ]"                                                                                                                                                                                  
xsetwacom --set 'HUION PenTablet Pad pad' Button 11 "key ["                                                                                                                                                                                  
xsetwacom --set 'HUION PenTablet Pad pad' Button 12 "key p" 

And it is as simple as that. The tablet and stylus are fully functional and can be further customised to suit individuals needs.

References

Installing linux (Lubuntu 20.04 LTS) onto a Pipo X7 Mini PC (Intel Z3736F)

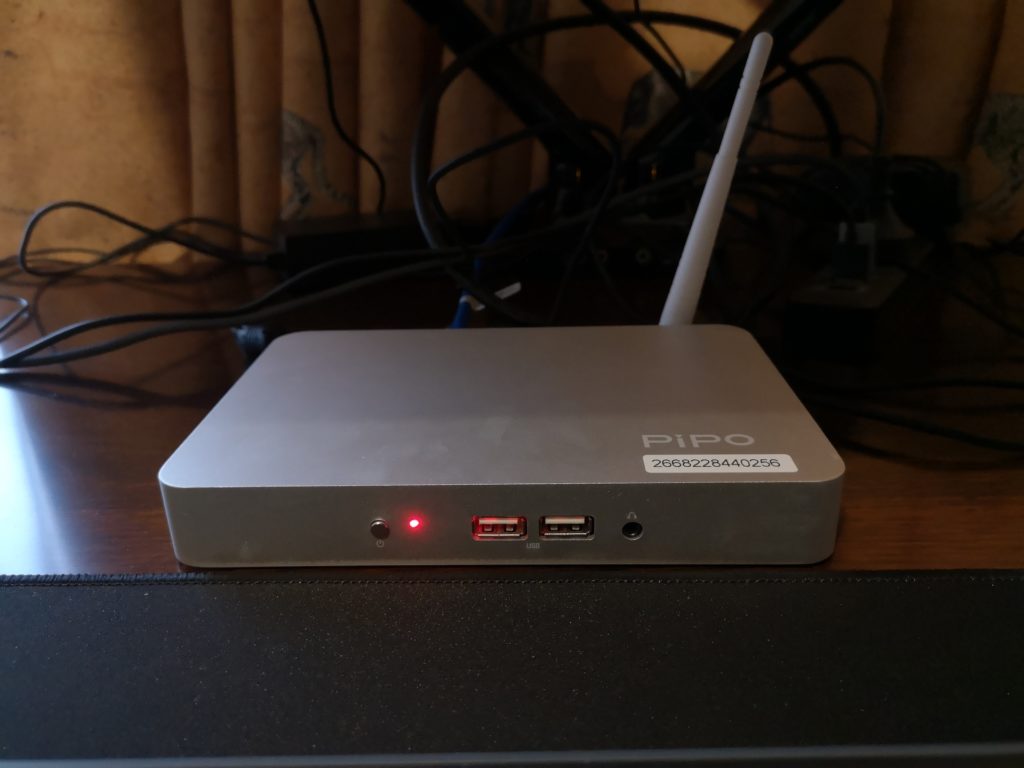
I had pretty much forgotten about this little device when I recently uncovered it stashed away in one of my drawers. Originally purchased in early 2015 for around $100, it was hooked up to my dumb TV to make it smarter and used as a media center.

Pipo X7 Mini PC

Pipo X7 Specs

  • CPU: Quad Core Intel Atom Z3736F 1.33 GHz (2.16 GHz burst)
  • Graphics: Intel HD 313 MHz (646 MHz burst)
  • RAM: 2G DDR3L 1333Mhz (Single channel)
  • Storage: 32G eMMC (Samsung MBG4GC)
  • Wireless: 802.11b/g/n, Bluetooth 4.0 (Realtek?)
  • IO: 4xUSB 2.0 ports (2 front, 2 back), 1xHDMI out, 1×3.5mm Audio out, 1xTF/micro SD, Fast Ethernet (100/10mbps)
  • OS: Windows 10 x64 (upgraded free from Windows 8.1 Bing)

It was able to get a couple of years of use before being replaced by better 4K capable Android media players (NVIDIA Shield).

Having a lot of free time on my hands (thanks COVID) I was curious to see what else it could be used for, so I booted it up and played around a bit.

It has a genuine Windows 10 license (originally 8.1 Bing that was freely upgraded) which I was able to update to the latest patches with no issues.

With the device updated I started playing around with it by attempting to use it as a normal desktop computer. Very quickly I discovered some major downsides to the aging hardware:

  • Low RAM: with just 2G of memory this device was seriously struggling when running any modern browser. Even just having a single firefox tab open and browsing YouTube was eating up almost 1G of memory. I also noticed there was a 500M page file being constantly utilised. This resulted in a sluggish and stuttery experience when web surfing.
  • Slow Storage: (32G eMMC) though low capacity it is adequate for simple internet browsing and office work. I ran a CrystalDiskMark test and found although the sequential read/write were decent (160M/s & 80M/s) the random R/W were low at 20M/s & 10M/s
  • Weak WiFi: the wireless connection was very flaky and signal strength fluctuated dramatically. I was only able to achieve a maximum of 20mbps and averaged around 10mbps.
  • Video playback: it was able to handle most 1080p video streams, but anything of significant bitrate or more demanding codecs would suffer pauses and frame drops.

I struggled to use the Pipo as a light office desktop, mainly due to the RAM limitation which modern browsers absolutely eat up.

Enter Lubuntu

To try and get more use out of the Pipo I wanted to install linux and after some quick googling I chose the Lubuntu distro for its supposed light-weight features. So I grabbed the latest LTS version (20.04) from lubuntu.me and created a bootable USB.

By pressing ESC or Del on startup to get into the Pipo BIOS, I configured it to boot from our USB, and here is where a major hurdle occurred:

I couldn’t get the Pipo X7 to load GRUB and boot from the Live USB. It just simply wasn’t displaying anything and would fallback to either the Windows partition or the default EFI.

After searching around, I discovered that this device and many like it are shipped with 32bit EFI firmware which is not included/supported out of the box with most distros. So I continued digging and found an awesome utility by Linuxium called isorespin.sh

Using isorespin I was able to ‘respin’ the Lubuntu ISO to include a 32bit boot loader and support for Intel Atom using the following command:

$ isorespin.sh -i lubuntu-20.04-desktop-amd64.iso --atom

After the utility has finished, a linuxium-*.iso is created and ready to be written to our installation medium (USB). Plugging in the USB and booting from it worked straight away with no issues and I quickly went through the installation steps, opting to format the entire eMMC disk.

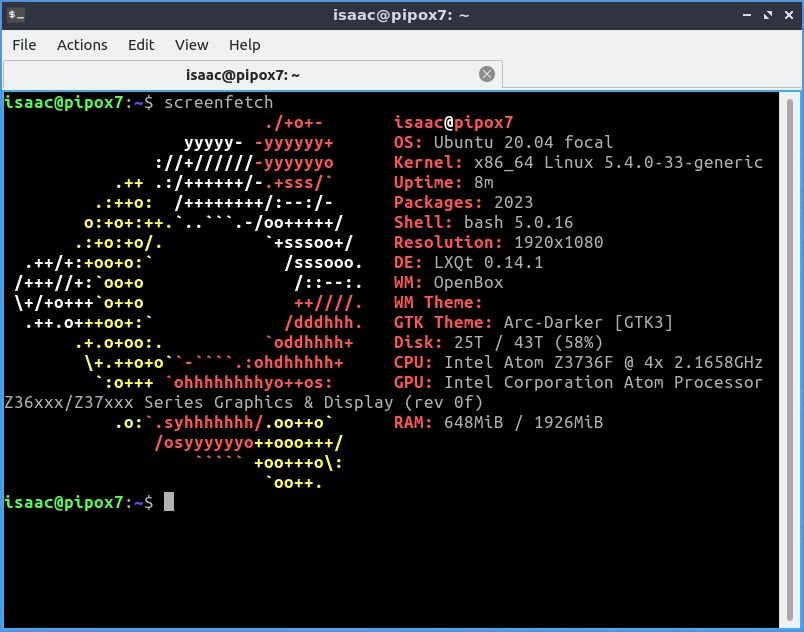
To my joy and surprise, after installing Lubuntu 20.04 LTS everything is working out of the box. The HDMI sound output which had been an issue previously (from ~2015 forum posts) appears to have been fixed in the more recent distros.

Pipo X7 running Lubuntu 20.04 LTS – note: Disk is including my network shares

The Pipo’s wireless speeds were never very good for me, even though the box itself does feature a wireless antenna it varies greatly between 8-20mbps.

isaac@pipox7:~$ speedtest-cli
Testing download speed................................................................................
Download: 10.24 Mbit/s
Testing upload speed......................................................................................................
Upload: 18.61 Mbit/s

Thankfully the rear fast ethernet jack (100/10) works well and I was able to achieve decent speeds with it plugged in:

isaac@pipox7:~$ speedtest-cli
Testing download speed................................................................................
Download: 85.87 Mbit/s
Testing upload speed......................................................................................................
Upload: 26.91 Mbit/s

Now that the network has been sorted out, I tested the web browser experience and found it to be actually worse than windows 10. The 2G of RAM (around 1.5G available) is taken up by Firefox very quickly with just a couple of tabs open (youtube, reddit etc). Once the memory is filled everything freezes and a force restart is required.

RAM – swap & zramswap

I found that setting up and enabling a swapfile (or partition) helps – I opted for a 2G swapfile, but it is still not ideal.

After looking around I found zramswap which utilises ZRam to create compressed swapfiles in memory. Installing and configuring was simple as follows:

$ isaac@pipox7:~$ sudo apt install zram-tools

I updated the default config to use 70% of RAM as zramswap:

# /etc/default/zramswap
...
# Specifies the amount of RAM that should be used for zram
# based on a percentage the total amount of available memory
PERCENTAGE=70
...

Control and enable/disable zramswap using start/stop/status:

isaac@pipox7:~$ sudo zramswap start

Check to make sure the zramswap service is enabled and running (so it will auto setup on boot):

isaac@pipox7:~$ sudo systemctl status zramswap

Check your swap/zramswap:

isaac@pipox7:~$ cat /proc/swaps
Filename                                Type            Size    Used    Priority
/swapfile                               file            2097148 0       -2
/dev/zram0                              partition       345196  109832  100
/dev/zram1                              partition       345196  111300  100
/dev/zram2                              partition       345196  114776  100
/dev/zram3                              partition       345196  111324  100

isaac@pipox7:~$ sudo swapon --show
NAME       TYPE        SIZE   USED PRIO
/swapfile  file          2G     0B   -2
/dev/zram0 partition 337.1M 107.3M  100
/dev/zram1 partition 337.1M 108.7M  100
/dev/zram2 partition 337.1M 112.1M  100
/dev/zram3 partition 337.1M 108.7M  100

With zramswap configured and enabled, I found the cpu hit was minimal and the web browsing/multitasking experience greatly improved.

Conclusion

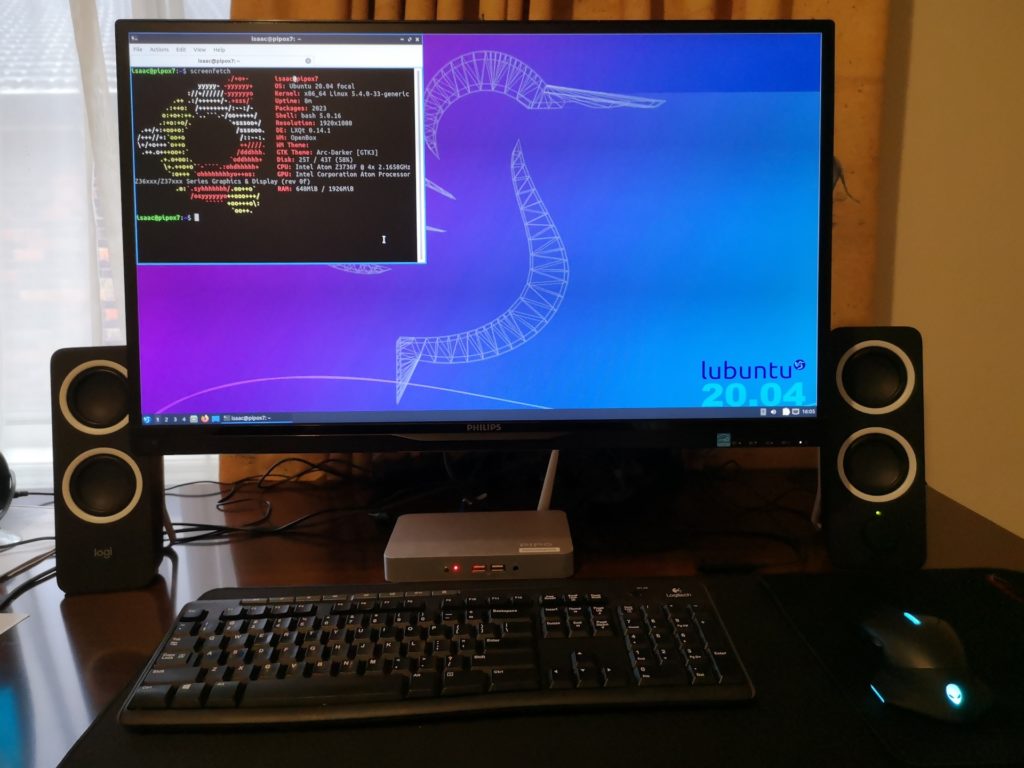
Final Pipo X7 desktop set up

An interesting little journey on installing and configuring linux for low powered/resource (ie. RAM) hardware. I hope whoever is reading this gained some insight on installing a 64bit OS onto 32bit EFI. Also setting up swap and zramswap is a crucial step for being able to use modern browsers (Firefox or Chromium) on such low amounts of RAM.

After installing Lubuntu and some tinkering, I am able to do light office work (drafted and published this post with it) and have seen a noticeable improvement in video playback capabilities which I attribute to lower resources of the OS vs Windows 10.

I can also confirm this same process to install linux works for the Ainol Mini PC Z3735F 7000mAh

Resources

Azure Storage (Spring Starter) – Error Status Code 400: AccountRequiresHttps

The following error occurred in a recent project that required integration with Azure Blob Storage and an existing Spring Boot application:

Error Status Code 400: AccountRequiresHttps

Resolution:

Apply azure.storage.enable-https=true to your application.properties file

Resources:

https://github.com/microsoft/azure-spring-boot/pull/495/commits/ff5e26b691144677da94f2a6d59de79ce08fda16

vnstat – Error: Unable to read database

Error: Unable to read database "/var/lib/vnstat/eth0": No such file or directory

This error will appear when vnstat is not configured to the correct netwrork interface. You can check what interface your device is using with ifconfig:

$ ifconfig
enp3s0: flags=4163 mtu 1500
...

And to make sure your vnstat is monitoring your identified network interface you can check for the database files located in: /var/lib/vnstat/

$ ls /var/lib/vnstat
enp3s0 wlp2s0

Now you just need to add it to your vnstat config. You could simply edit the default config file located at /etc/vnstat.conf which would apply globally. However it is recommended to create a local config for your user. Copy the global config into your home directory like so:

$ cp /etc/vnstat.conf ~/.vnstatrc

And update the default database to your selected network interface:

# default interface
Interface "enp3s0"

Save and you should be able to run vnstat and check your bandwidth stats.

$ vnstat -d
enp3s0 / daily

     day         rx      |     tx      |    total    |   avg. rate
 ------------------------+-------------+-------------+---------------
 07/08/2019    61.04 MiB |    6.05 MiB |   67.09 MiB |    6.51 kbit/s
 07/09/2019    25.36 MiB |  152.33 MiB |  177.69 MiB |   17.25 kbit/s
 07/10/2019    10.38 MiB |    2.12 MiB |   12.51 MiB |    2.38 kbit/s
 ------------------------+-------------+-------------+---------------
 estimated        19 MiB |       3 MiB |      22 MiB |

Resources

Migrating Django production database from SQLite3 to PostgreSQL using PgLoader

Today I ran into the issue of having to migrate an sqlite3 database to postgres for a Django app that was in production. The data needed to be kept untouched and seamlessy transitioned as it was real production data. After some research on the subject there were at least two options I found that worked.
Firstly always make sure you have safely backed up your sqlite database, next correctly setup your new database in postgres. (

$ createdb <db_name>

)

The first method is to use django to dump the database as json objects using:

$ ./manage.py dumpdata > db-data.json

Apply your database config changes to your app’s settings.py file and then import the database from the json file with:

$ ./manage.py loaddata db-data.json

But this operation was taking a long time and used a high amount of memory to export and import all my production data.

Enter PgLoader.

To import from your sqlite database simply run the following command (no sqlite data exporting required!):

$ pgloader --type sqlite db.sqlite3 postgresql://:@localhost/

I had initially run into some errors trying to use PgLoader such as:
An unhandled error condition has been signaled:

Failed to connect to pgsql at :UNIX (port 5432) as user “”: Database error 28000: role “” does not exist

I just entered the database credentials (db_username and db_password) to the command above.

An unhandled error condition has been signalled: :UTF-8 stream decoding error on #: the octet sequence #(204 199) cannot be decoded.

This was resolved after providing the –type flag to specifically tell PgLoader that the database was of sqlite type.

                    table name       read   imported     errors            time
------------------------------  ---------  ---------  ---------  --------------
fetch                                   0          0          0          0.000s
fetch meta data                        37         37          0          0.047s
create, truncate                        0          0          0          1.406s
------------------------------  ---------  ---------  ---------  --------------
django_migrations                      14         14          0          0.103s
app_userclass                           0          0          0          0.009s
app_userseries                      40132      40132          0          3.200s
app_usercollection                  50248      50248          0         27.978s
app_user                             2893       2893          0          1.251s
app_user_roles                          0          0          0          0.008s
app_externallink                        0          0          0          0.009s
app_tag                                 0          0          0          0.013s
app_file                                0          0          0          0.009s
app_screenshot                     392909     392909          0       1m51.695s
app_thanks                              0          0          0          0.015s
app_collectiontag                       0          0          0          0.028s
app_articles                        71307      71307          0         52.428s
auth_group                              0          0          0          0.015s
auth_group_permissions                  0          0          0          0.010s
auth_user_groups                        0          0          0          0.016s
auth_user_user_permissions              0          0          0          0.009s
django_admin_log                        0          0          0          0.037s
django_content_type                    17         17          0          0.094s
auth_permission                        51         51          0          0.061s
auth_user                               0          0          0          0.008s
django_session                          0          0          0          0.061s
index build completion                  0          0          0          0.064s
------------------------------  ---------  ---------  ---------  --------------
Create Indexes                         29         29          0          6.186s
Reset Sequences                         0          0          0          1.435s
------------------------------  ---------  ---------  ---------  --------------
Total streaming time               557571     557571          0       3m20.009s

As seen from the results table, all data and indexes were successfully transferred into the PostgreSQL database. I quickly ran some tests to confirm everything was running fine.

All in all a relatively quick and painless transition from sqlite to postgres thanks to PgLoader.

Some resources:

Ubuntu 16.04 LTS UI and/or Windows freezes with mouse and keyboard working

Ever since upgrading my PC hardware (graphics card) to Nvidia 970 and 1070 GTX I have been plagued with Ubuntu’s Display Manager constantly (and seemingly) randomly freezing. It was also occurring with Ubuntu 14.04 LTS.
The only solution I could find to combat this was to restart LightDM.

I would hit Ctrl + Alt + F1 to open up the shell and login. Then restart the lightdm service:

$ sudo service lightdm restart

This would restart the display manager and would stop the freezes occurring, for a while at least. The most annoying this was having to do this literally every time I booted or logged in.

After trying fresh installs, Unity tweaking and other ‘fixes‘ I finally made the transition to Debian 9 and the default Gnome 3 window manager. And to my delight it appears the problem has gone away!

I will be sticking with Debian from now on (at least until I upgrade hardware again).

Downloading shared Dropbox files to a remote server via command line (CLI) and cURL

On occasions I have found it very handy or even necessary to download large archive files from a Dropbox share to a remote server. Rather than downloading it to my local machine and then uploading it back to the server (via FTP for example). It can be directly downloaded to the target machine through the terminal.

Simply make sure the share url has dl=1 appended as a query parameter:

curl -L -o archive-name.zip https://www.dropbox.com/sh/r4nd0mURL?dl=1

-L is telling cURL to retry the request to the specified redirect location, if a location header is received from a 3XX response. For example if Dropbox gives a HTTP 3XX redirect response directing to a temporary download link, cURL will re-try the request using the link. Basically it will follow the redirect if there is one.

-o is simply for the output filename of where you want to store the response.

Resources: